As this virtual machine setup via virtualization is separate from the main system, there is no issue of messing up with the files on the main system. But before you can create a virtual machine on your Windows 10 PC or laptop, you have to first enable this feature. This is where this post comes in. We will guide you with all the requirements, along with the steps that you need to follow in order to enable virtualization on Windows 10. With that said, let us get straight into the article itself:
Requirements
Before we go ahead and look at the steps that are required to enable virtualization on Windows 10, you first need to make sure that your PC matches the requirements needed to support this feature. You can go through the list of pre-requisites to check whether your system matches the requirements or not:
Windows 10 Pro or Enterprise (Hyper-V isn’t available on Windows 10 Home Edition)64-bit processor with Second Level Address Translation (SLAT) support4GB system RAM at minimumBIOS-level Hardware Virtualization support
Check Hardware Virtualization support
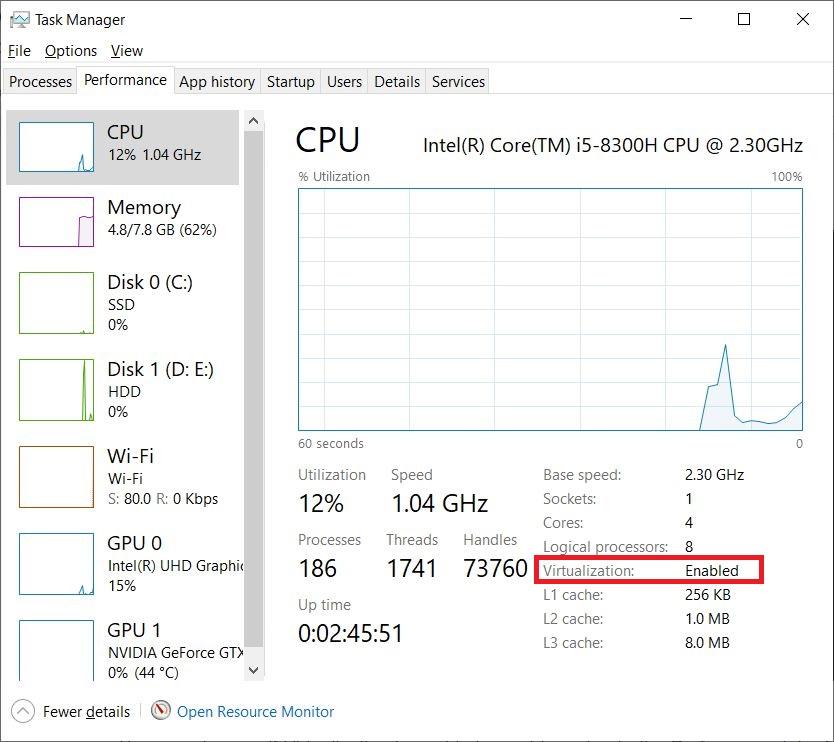
Although the requirements are mentioned pretty clearly in the above section, there are a bunch of steps that you can follow to check whether or not your device supports hardware virtualization. Follow the steps below: You can also see if Virtualization is enabled or not by going to the Performance tab of the task manager.
Simply press the Ctrl+Alt+Del buttons on your keyboardSelect Task Manager or right-click on the Taskbar and select the Task Manager option to open the Task Manager.Once the Task Manager is open, head to the Performance tab and check the Virtualization section (as shown in the image below).
Enable Virtualization Via BIOS or UEFI Settings
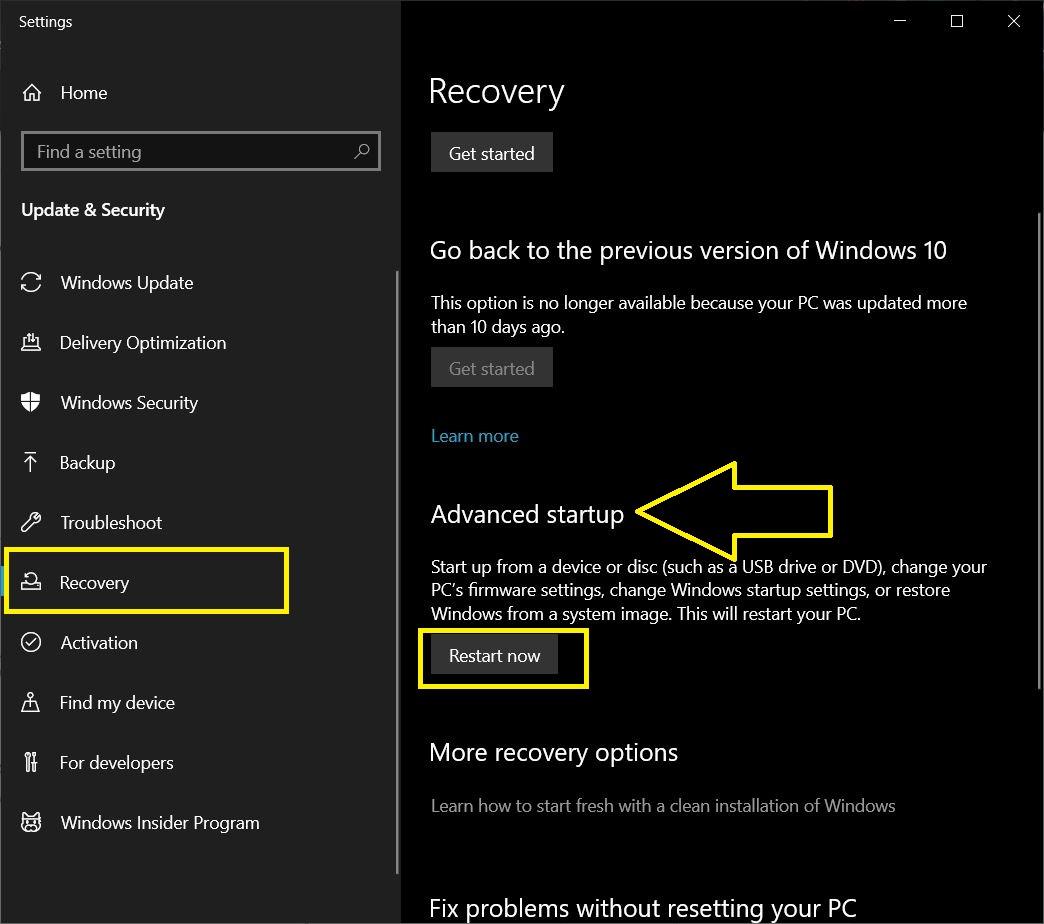
If the Virtualization is enabled on your PC then you are good, but if it is not then, you need to enable virtualization from the BIOS or UEFI settings. Do not worry, we have you covered here as well. To enable Virtualization from BIOS or UEFI settings, follow the steps below: Just to make things easier for you, if you do not know the key that enters your system in the BIOS menu, you can follow the universal way of doing that by following the steps below: One should not confuse the different names, that different processors use for Virtualization.
Intel Virtualization Technology,AMD-V,Hyper-VVT-XVanderpoolSVM
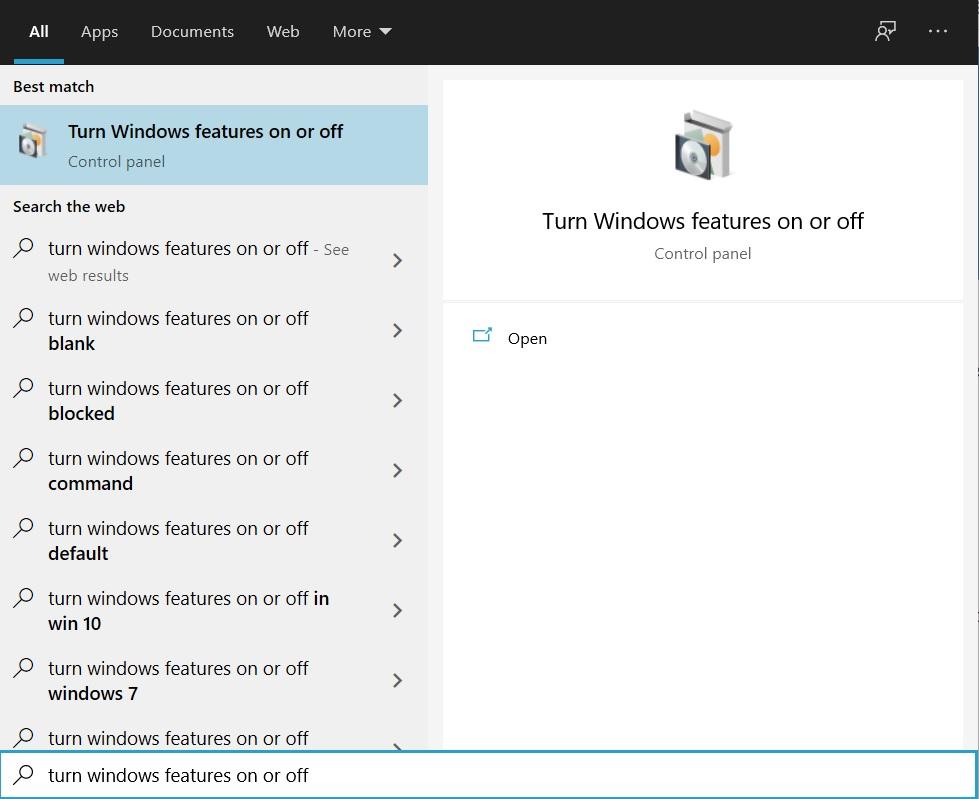
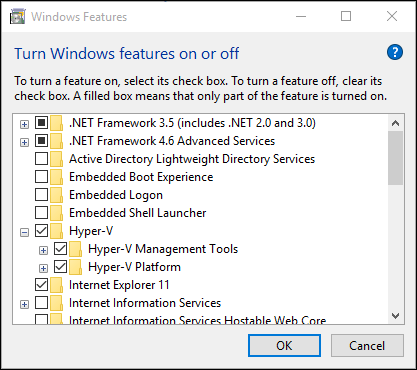
Enable Virtualization in Windows 10
Now that you have enabled the virtualization settings via any of the two methods mentioned above, you need to enable it on Windows 10.
Conclusion
So, there you have it from my side in this post. We have tried to ease down all the steps to make this process enabling pretty easy for everyone. However, if you have any doubts regarding any of the steps mentioned above, you can reach out to us via the comments section below. For more such awesome articles, you can follow DigitBin. Until the next post…Cheers! If you’ve any thoughts on How to Enable Virtualization On Windows 10? , then feel free to drop in below comment box. Also, please subscribe to our DigitBin YouTube channel for videos tutorials. Cheers!