What Are The Different Methods To Debloat Windows 11 PC?
There are different methods available for Windows users using which you can easily debloat Windows 11 PC. Thus, in case you aren’t familiar with those methods, make sure to perform the different ways mentioned further in this article. So, let’s get started with them:
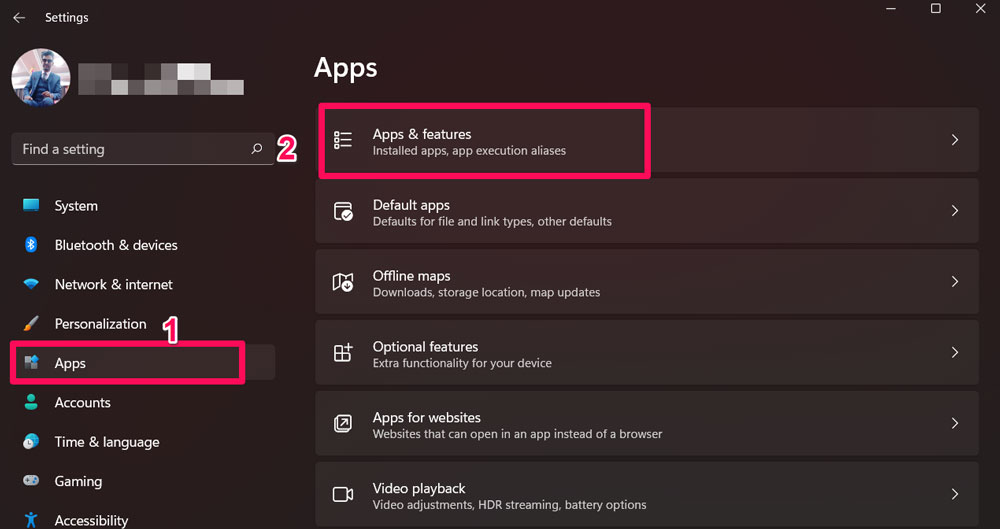
Method 1: Via Windows Settings
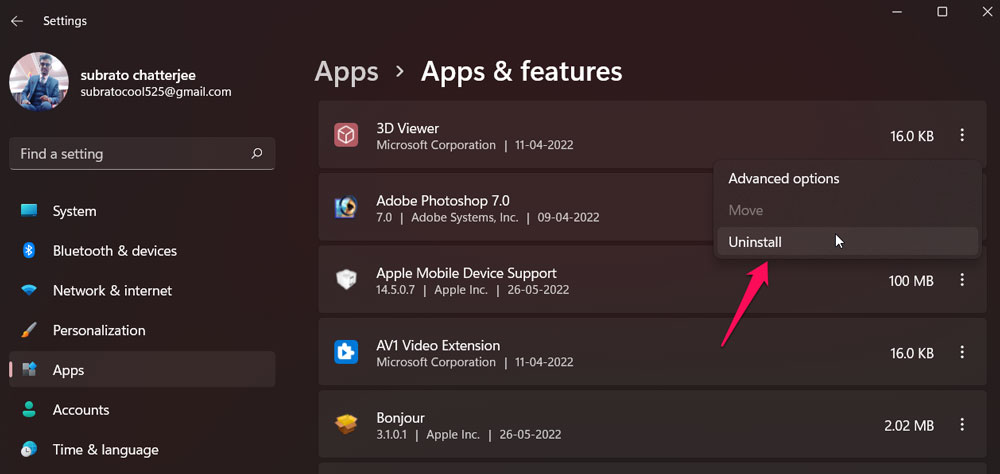
This is the easiest method that we have for you today; you can use the Windows Settings page in order to debloat Windows 11 PC to improve performance. So, let’s check out how you debloat the Windows system using this method: That’s it. Repeat this for the other applications and check if your system performance gets improved or not. However, there are chances that some of the system application doesn’t get deleted from your system using this method as you need to perform some advanced tricks to remove them. So, don’t worry; we have mentioned all the methods further in this article.
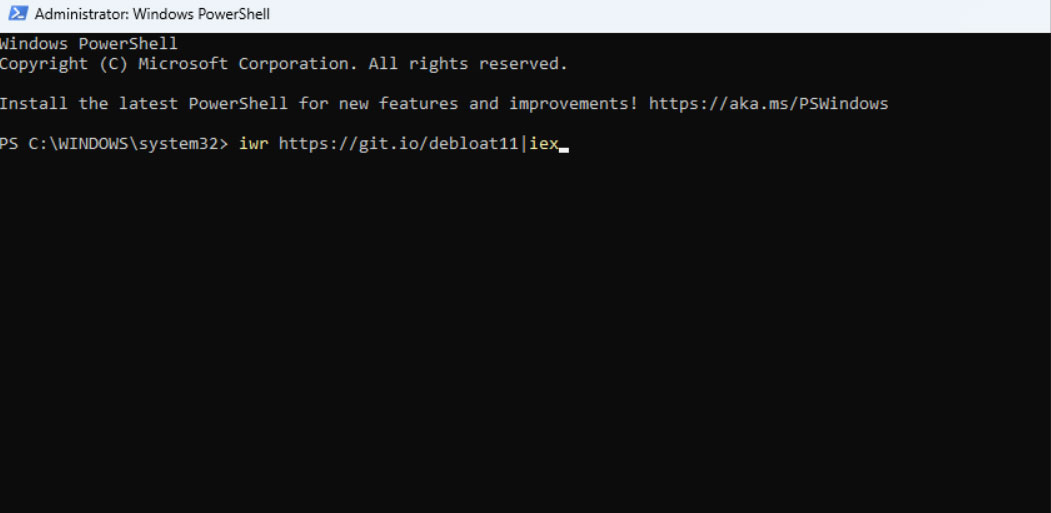
Method 2: Via Power Shell
You can also use the Windows 11 Power Shell to remove the bloatware in order to increase the performance of your system. So, if the above method doesn’t worry for you, make sure to perform the below steps:
Firstly, press Win+X and select the Windows PowerShell (Admin) option.Then, execute the command:iwr https://git.io/debloat11|iex
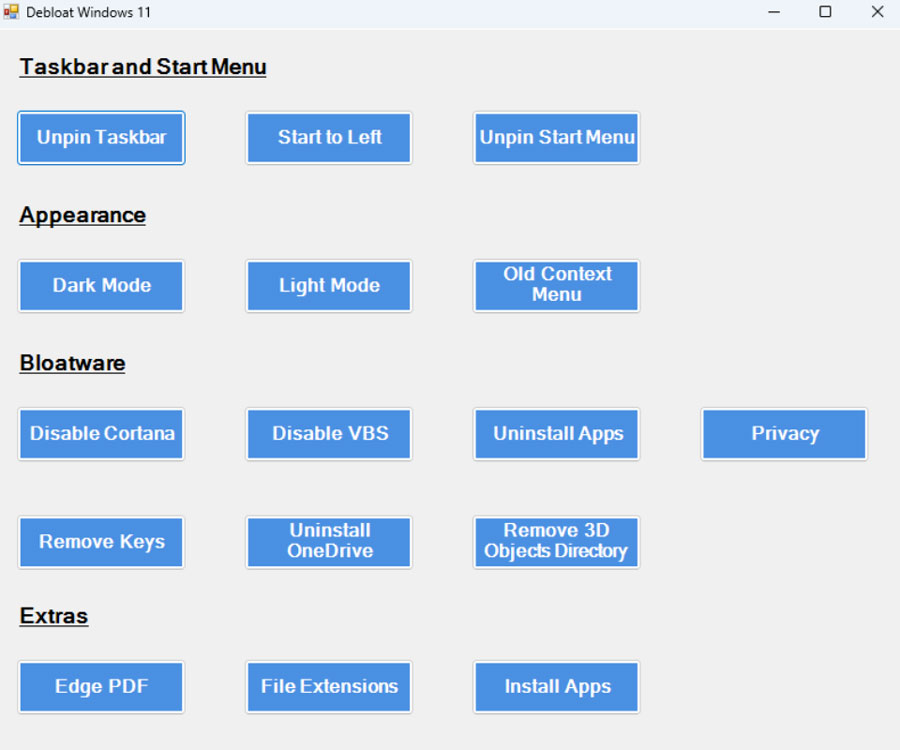
Thereafter, in the Bloatware section, select the feature that you wish to remove from your Windows 11 PC and follow the on-screen instruction to remove them permanently.
Now, check if your system performance increase or not. However, most probably this will work for you, but in case it doesn’t give you proper result, then don’t worry! We have more options for you.
Method 3: Use Third-Party Tool
You can use a third-party tool if the above two methods don’t work for you. You can simply hover over to the GitHub page and get a debloater software for Windows 11. However, several users are there who have reported that using the GitHub debloater for Windows 11, they were successfully able to remove the unwanted feature to make their PC fast. So, try this and let us know if this method helped you.
Method 4: Via DISM
In case nothing helps you remove the bloatware from your Windows 11 PC, then you can try using running the DISM command on Windows Power Shell. So, to do this, you have to perform the needy steps we have mentioned below:
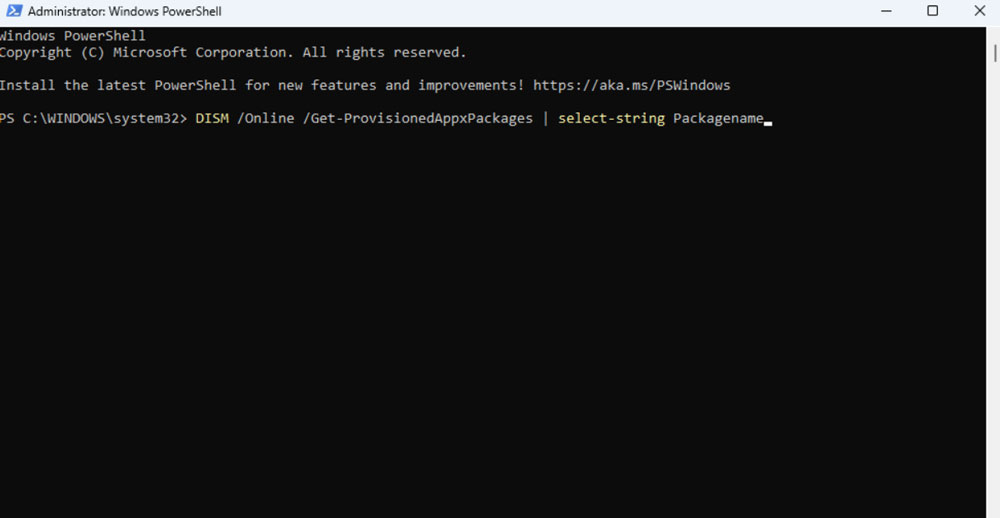
First of all, press Win+X and select the Windows PowerShell (Admin) option.Then, execute the command:DISM /Online /Get-ProvisionedAppxPackages | select-string Packagename
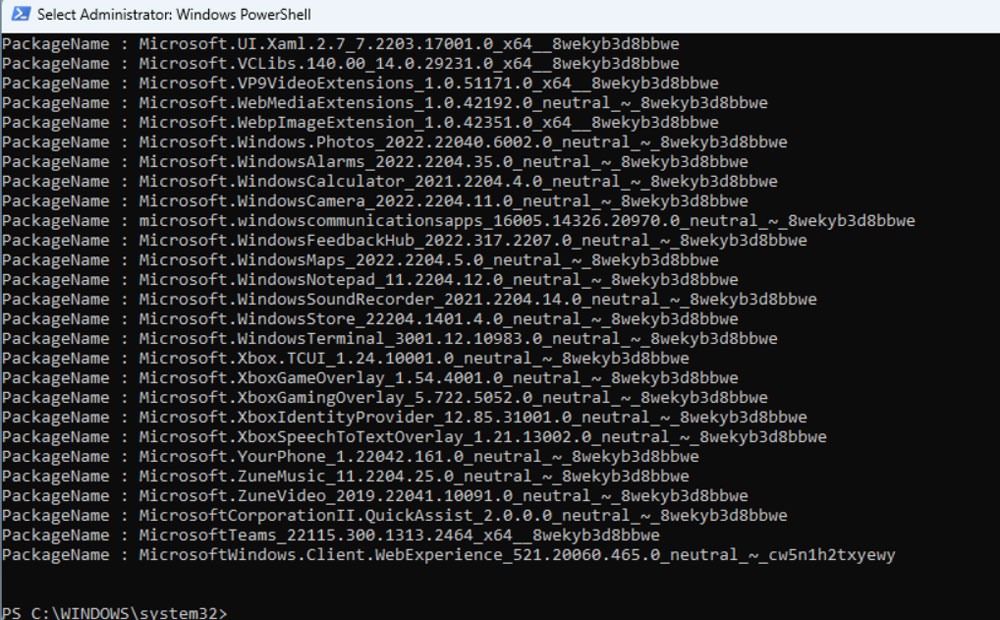
Now, the script appears will show you all the programs that are installed on your Windows 11 PC. So, you have to manually locate the app that you want to remove and copy it.
Then, again execute the command:DISM /Online /Remove-ProvisionedAppxPackage /PackageName: Abc
Don’t forget to replace the ABC with the application path you have copied before and hit the enter key to initiate. That’s it. This will remove the particular application from your PC.
Conclusion
So, as you can see, debloating your Windows 11 PC in order to increase performance isn’t a big deal. But, we suggest you take a backup of your system or create a system restore point so that if the changes are not going well, you can use them to restore your PC to working condition. Anyway, that’s it in this guide. If you’ve any thoughts on How to Debloat Windows 11 to Improve Performance?, then feel free to drop in below comment box. Also, please subscribe to our DigitBin YouTube channel for videos tutorials. Cheers!